1. Create a new metric
Create a new metric by clicking New Metric on the Home screen, or head to the metrics page and create it there.

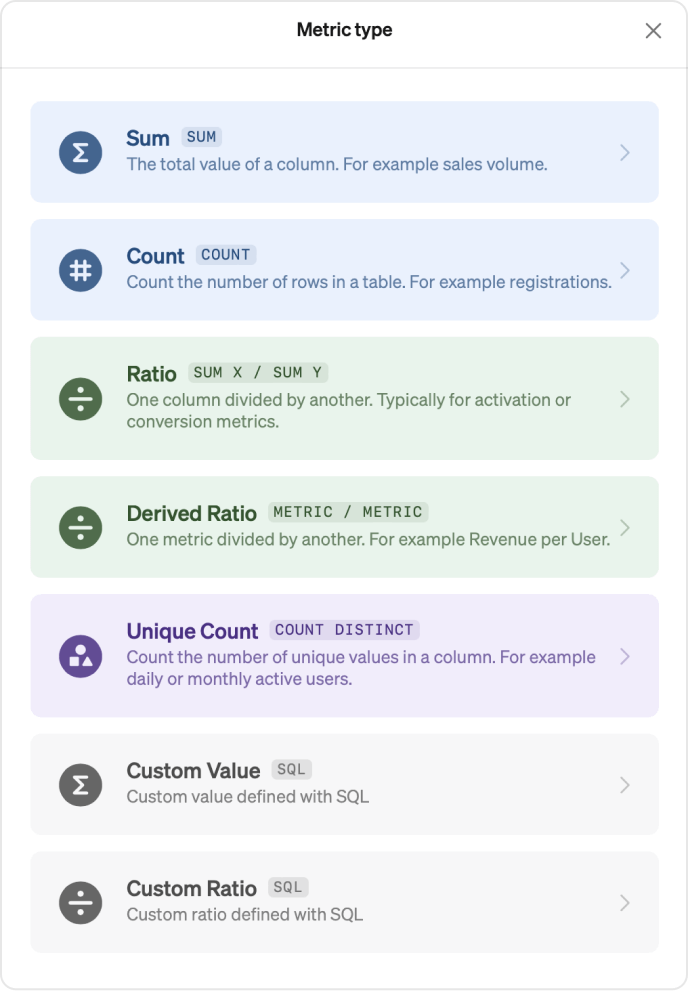
2. Select a template
Select one of the templates;
| Type | Description |
|---|---|
| Sum | calculates the total value of a column |
| Count | counts the number of rows in a table |
| Ratio | divides one column by another |
| Unique count | counts the number of unique values in a column |
| Custom value | allows you to write your own SQL expression |
| Custom ratio | divides one custom SQL expression with another |
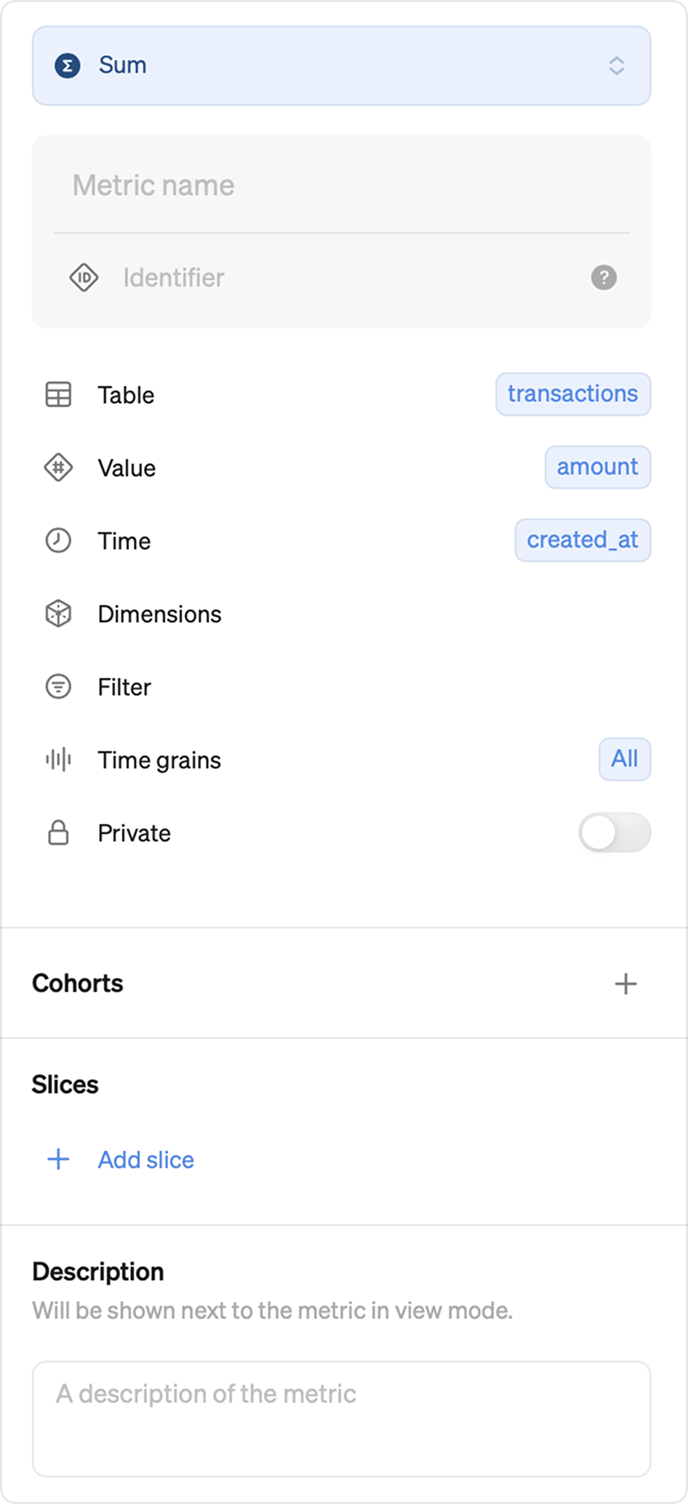
3. Define the basics
A metric must at least have a Table, Value, Time, and a Name.
Select a table
Press the Table field and select a table or view from your database.
You can also create a join to use instead of a table.
Set up value
Press the Value field and select a column from your table. This will be used to aggregate and calculate your metric value.
If you selected Ratio as a template before, you will instead get two fields here, Converted and Base, that work in the same way and calculates a percentage.
If you selected a custom template you will instead write a custom SQL expression here.
Select time
Press the Time field and select a column. This will be used to plot and analyze your metric over time.
Additional metric properties
There are plenty of more properties you can use to define your metric.
Learn all about metric properties
4. Preview metric
When the basics properties are defined you will get a preview of your metric to help you validate it. And for full visibility you also get the query Steep composes for the metric. The query can easily be copied if you want to verify the calculation.
Any time you make a change to your metric definition and want to preview the results – just hit Refresh.

5. Save it
Finally save your metric. Good job, this metric can now be used across your workspace.